How much typing can someone do!

Wow, it has been quite the week. I have decided to help some friends not only with their car build but also in setting up a new site.

IMG_5621

The Kern’s! They are a husband and wife race team and wow are they fast. Dave is the driver, Allison the navigator and they are quite the duo. At Pikes Peak I ran a camera on their car a couple years ago and they broke the record in their class. That record stands today. Every year since then they have had some mechanical issue. Nothing that can’t be fixed with Time or Money, but of course they don’t have unlimited resources and they work full time! So I decided that helping them not only with their car build (which is maybe a bit more selfish cause I am learning a ton) but also with their web presence is crucial. I talked to them and they gave me free reign. So now I am finishing off their site and it is turning out nicely! ALl they have to do is drop in writeups whenever they can and it will constantly be updated. With new content comes new visitors and repeat visitors. Their content is awesome too so it should be pretty good for them. check out their site! racekern.com

In addition, this week I have been setting up a blog for work as well. This content doesn’t come as easily! With the Kerns I had to copy and paste, with the work site I had to wrangle people, write posts and just pour over the site for hours. It turned out great and our new designer is doing a great job of opening up functionality. Check out that blog here excelsportsblog.com

Lots to do and little sleep to do it with, I am making progress on another project that I am not ready to announce, but soon…we will blow your doors off!

Buildin’ the Bimmer

I’ve been helping Dave Kern build his BMW rally car whenever I have free time. Unfortunately that isn’t that frequent! It has been teaching me a lot about cars and letting me do one of the things that I enjoy the most, figuring out solutions to problems!

Dave has about 16 months into this car, I have maybe a few weeks, so I can’t take a whole lot of credit, but I was down there the other night and we got some of the “you may actually drive this soon” parts put on. Brakes are bled, the engine is all ready, pedals are in, skid plate mounts are in. It is actually looking like we may run this and stretch its legs this Sunday!

A quick note about Dave. Man can that guy drive. It is pretty incredible really. You don’t really have a solid appreciation for what a good driver can do until you are riding along and seeing all the things they can do with a car. Last year he drove my car at Georgetown and I watched as my car did things that I didn’t know it was capable of. I am pretty sure that even Subaru may have been baffled. This year I rode in my car again with him at the wheel at BWDS and again, wow. How does it do that! However one of the most awesome experiences was in Mitch Williams rally car. Dave threw that thing around and at one point said “yeah, that is about as far as I would want to push someone elses car.” I was thinking “well that is about 45% more than I would want to push my own car! Allison, his wife and co-driver is brave enough to ride with him and incredibly skilled at keeping him on track. I suspect we will see her behind the wheel of the Bimmer soon! Check out their website in my links, you’ll be following along with their adventures soon enough.

When the pedals are in, the steering wheel was installed and we could sit in the drivers seat. Well your imagination puts a track in front of you. Your peripheral blocks out the shop walls and you create the sense of speed and suddenly you realize that you are making the engine sounds you imagine will emerge from the hood. Yes, we both did this, but Dave quickly remembered…. TURN THE KEY!

Anthem Branding

I have been doing some tinkering in the shop! Last year I had the opportunity to help with the design of Anthems new space. Jeremiah and I had the chance to measure, analyze and design a new space. We got to be creative and we got to make some cool stuff. In the end I had the chance to put a lot of input into the front receptionist desk and some other elements of the space. It was a great opportunity and I really enjoyed working with him on the project.

Anthem Offices

This year however Anthem Branding has expanded, their space has stayed the same and they are trying to figure out how to get more people into their space! Jeremiah has been working in New York so I stepped up to help out. We talked about a lot of options and we ended up with the simplest options. Two very large library tables. With two tables each with three 40 inch sections we could house 12 people in the same space that seven people were occupying now.

I sent over some final drawings of the space and they were sold. so construction began!
AnthemDeskv3

This is the largest project that has come out of the “creation station” so far, at least in physical size! 4ftx10ft tables! With minimal flat surfaces to work with around the shop it was an interesting experience getting everything squared up.

Anthem Table

Anthem Table

Anthem Table

The design is intended to be raw, very simple materials, exposing the materials for what they are. Exposed welds and nice wood grain. I spent a bit of time getting things straight, square and sturdy. I choose 16g 2 inch square tubing. It came out nicely with some nice heat coloration from the MiG welds.

Once the two bases were built I cut down the wood to six 40inch sections and put a coat of finish on the bottom of each board. Everything mounted up square and nice so I routed a nice 1/8inch round over on the edges that met between each board and bolted them all in place on the tables. Once they were all attached I did a 3/8 roundover around the entire outside edge of the tables. This provides a friendly feel for the end users when they are at the table, rather than just a sharp machined edge. After a bunch of sanding and a bit of masking they all got 4 coats of finish. They all came out nice and smooth. Perfect finish and I think that they will hold up for quite a while.

IMG_6645

IMG_6646

You can see my nice cardboard cot under the one table, at one point it was easier to just stay at the shop…

I was able to borrow a friends Sprinter Van to deliver the tables, the delivery went smoothly, everyone involved realized how much steel and baltic birch weighs very quickly. Now that it is installed it looks perfect in the space. Anthem is still working out a few finishing touches for their new space, but overall I am very satisfied with their new tables and they seemed to be enjoying them as well.

Anthem Offices

Anthem Detail

Anthem Details

Anthem Offices

Anthem Offices

Another fun project in the works. I do enjoy designing and building these spaces! It is really fun to see it all come to life.

Kevlar and the Kerns

I’ve been living vicariously through some of my friends by helping them with their race cars. Mostly I’d say it has been Dave and Allison Kern. Originally I had helped them with some work on their Pikes Peak Hill Climb Evo. I did a bunch of work on their aero package, but also ended up welding some parts as well as installing and fitting body parts as well. It is fun to get to work on this stuff. There is a lot of problem solving and a lot of building, creating and working with your hands. Currently they are working on the creation of a BMW rally car.

IMG_6473

The BMW will be used as a 2wd Rally car. It is cheaper to run and compete in and with a privateer budget that is good news. It is also going to provide the opportunity to run in Max Attack which is a 2wd specific rally event that will give them good competition in an affordable package. If all that wasn’t enough the BMW will be set up so the drivers seat is able to accommodate a shorter driver or a taller one…so Allison now has the ability to drive!

The car has been caged by SCR Performance but Dave is taking on the majority of the rest of the work. The beginning steps (beyond all the research that he has into figuring out the parts for the car) is the underbody. The BMW isn’t exactly designed for Rally, so you have a couple options. Paint the car and replace the chassis when it gets wrecked or try to protect the chassis. The plan for this car was to protect the chassis with Kevlar and Macropoxy. Macropoxy is a paint that is a good barrier against rust and light impact. Kevlar, well that takes the bigger dings and dents well. The EVO Works well with the Kevlar under body, but it is separating a bit in places, so this time we tried a few different tricks to try to keep the body and the kevlar together.

IMG_6468

The Kevlar now has epoxy that has been seeped into all the welded seams so it hopefully gets more adheason, also we put chunks of Kevlar into some of the gaps between seem welds so those will hopefully give the kevlar even more places to adhere.

IMG_6470

It is a messy process, so we only have a few photos of this part. This is what the end result looks like. Almost time to flip the car over and start putting parts on it!

IMG_6469

IMG_6474

I’ll be helping them out whenever I can, so keep an eye back and I’ll post up some progress as we go. In the mean time you can check them out on Facebook

Kern Racing Fan Page

PPIHC Video, Jimmy Olson and Spencer Steele

Well after a week on the mountain and posting GoPro’s all over two open wheel cars I had a chance to tinker with the footage we got. Unfortunately I haven’t had as much time as I’d like, but we put together a nice little video. The audio is all engine and the speed is all as it happened. It is pretty impressive to ride along and see how close they get to the edge!

IMG_3032

Pikes Peak Hill Climb Aero Package

I have been a huge fan of the Pikes Peak Hill climb for a long time. I have been attending it for the last 7 years and it is pretty addicting. The procession to the top of the hill by all the fans, the sound of engines miles away firing up and the distinct roar of a V8 as it is bouncing off the rev limiter on a road that you just negotiated at 25mph.

The Kern's Family Truckster, its a bit faster than the original family truckster.

Over the years I have met more and more people who participate in this event. I have shot for publications such as Autoweek and even worked with companies like Suzuki to provide photos to their marketing. A few years ago I had the opportunity to provide video on Autoweek’s site. We ran a car on the record breaking Time Attack 4wd vehicle that year piloted by Dave Kern with his wife Allison in the passenger seat calling the shots. I was pretty impressed with the duo. It isn’t every day that you have athletes who not only are the top of their class, but also are willing to go talk to their fans. If someone approaches them, they will talk to that fan about any part of the car, course or preparation that they went through to get to where they are.

As I continue learning more and shifting more to building and creating things I have had the opportunity to help them out in another way. I talked to Dave not long ago and we talked about the wing that he runs on the back of his car. He has had two wings and both broke in one way or another. He had some remaining parts from the two wings but no way to put them together. So I volunteered to take on the challenge. Between the composite skills that I have acquired over the last couple years and the problem solving skills that I have always been cultivating I felt pretty confident that I could come up with something. So I picked up the wing from Dave and started looking at it.

I was given side plates and a wing that were made for different applications, so I slid them together in the most obvious way that I could and started working on an appropriate way to mount these together. My goals were to provide a clean flow of air around the mounting points, provide adjustability for the wing, so he could tune it for his future needs and also (because I could see the wing shaking when he was racing) I wanted to stiffen the whole assembly up.

Kern PPIHC Wing

Kern PPIHC Wing

I cut off the old mounting tabs, and designed a new mounting system. It consisted of custom machined aluminum attachments that would epoxy through the wings sides. The goal of these parts was to allow the user to tighten the wing to the sideplates without crushing the interior foam of the wing. The attachment points flush mounted on the outside of the wing and bulged out in the inside surface. They provide enough threads to live up to aerospace standards, though I wouldn’t say that they are aerospace quality…I mean..I made them!

Kern PPIHC Wing

Kern PPIHC Wing

Once the inserts set I needed to figure out the guy wire setup. Guy wires were the best way to add lateral stiffness to the wing without causing to much aerodynamic drag. I wanted it to be clean and simple, but reliable and stiff. Dave wanted it to be easily interchangeable from trunklid to trunklid in case they needed to move it at some point in the future. So I started brainstorming and came up with a stainless pill design that was able to find its perfect angle in an aluminum cradle. This, of course, is probably overkill, but you know what. It is a great solution! It works incredibly well and I couldn’t be happier with it.

Kern PPIHC Wing

Dave_wing_sideplate_back

I designed the part in solidworks and revised it a couple times. In the end I had a bit of assistance from John Grimberg to come up with this.

IMG_1155

The system works perfectly. Once attached the guy wire increased the stiffness of the wing by what I can only estimate as a 100% gain. It is incredibly stiff now, this is going to provide the carbon part of the wing a lot less load in the corners and allow it to focus on its job of keeping the car on the ground!

IMG_1161

IMG_1159

We will be mounting this thing up and hopefully heading to the track tomorrow to test it out. With easily adjustable increments for the wing it is now tunable so dave will be able to decide on 16, 19, 22 and 25 degrees for the back wing which means that he can decide how he wants it set up in order to serve his driving style the best.

The wing will be mounted up by tomorrow and on the track for testing the same day. It will be nice to have the opportunity to test it out, try out the different angles and be sure that it is all functioning as it should be before the event!

Old News/Projects

I realized the by starting this blog fairly late I didn’t get to show some of my biggest projects. So here are a few projects that I have done over the years that I think are pretty cool.

IZ7Q7861

IZ7Q7861Table Project
A long time ago…or maybe not so long ago, but it seems that way. I started going back to school again and the first project that I started with was a coffee table. Actually, my feet are resting on it as I type this entry! The goal of the table was to make something that I thought was pretty cool, professional looking quality and utilized processes that I had never done before. Machining, welding, powdercoating and specing parts with a company were all part of it and the experience led to more and more projects in the future.

I was fortunate to have a good friend of mine named John Grimberg. John was nice enough to take me under his wing. he taught me a lot about machining aluminum and it really helped move the project along. The table utilizes a welded steel base with a baltic birch top. Above that floats a 1/2″ piece of glass that sits on 6 risers that are all made of 3 sections. Everything was hand made and the glass is the only part I didn’t actually cut. I was the only person in my class to have a finished project and I can assure you that it was a lot of work to get done, but it is one of my favorite pieces of furniture!
Table Riser detail
Sideview of the risers
Table overview

Red Bull Soap Box 2008: Team Save Ferris

3D5R9586
One day I set out an email to my friends. Hey guys, who wants to compete in the Red Bull Flugtag event? Well turns out that they all wanted to! However we changed our tune when we realized that Red Bull was having a soapbox race in our town! So we sat down and we came up with a new plan. Red Bull Soapbox in Denver. We sat down one evening around a table at Matt Fishers house and came up with the plan. Team Save Ferris. We would construct our version of the Ferrari 250GT from Ferris Buellers day off. We spent a LOT of time on this vehicle. I mean days turned to nights nights turned to weeks and weeks turned into a 1st place finish! We were incredibly excited about our winning finish, but I have to tell you, sharing how we built it is almost more exciting! So cruise on over to teamsaveferris.com and check out all the info on how we built this thing. We did a very extensive writeup.

Red Bull Soapbox 2009: Team Speed Racer

After a successful race the year before we had to try again! How do you follow up not only a very cool looking car but a very successful trick that surprised all of our fans as well as the judges? Well we decided to focus on the car. Lets make the coolest car that has ever been created! We decided the Mach 5 from Speed Racer was the best way to go. We also decided that we were going to take this to the next level. This time we planned on making a female mold and doing this “the right way.” Again, I don’t feel the need to tell you all about it since we did a very extensive writeup so check out www.goteamspeedracer.com for more info on this build.

Both the Ferrari and the Mach 5 are being displayed in the Forney Museum in Denver. If you have a chance stop on by to check them out!

Installing a Hitch on the Mini

Matt Fisher stopped by the other day. He just got a new (to him) Mini Cooper S. This is quite a change for him since he is used to rolling around in a Mini-VAN that has more room to store everything than you could actually need! So part of his deal with himself about getting a mini is that he knew he would need to have a nice solid bike race for it. Hitch mount was preferred. If you are familiar with the Cooper S, then you know the tailpipes are in the center of the car which makes a hitch a bit tough to put on there. Well Matt did a bit of looking and found a nice hitch that fits behind the bumper and utilizes a factory cutout. It is nice, it is clean and it is completely undetectable unless you remove the cover.

I know this seems mundane, and most of these projects are a bit more interesting, but here’s the thing… I obviously have a need to take either photos or video of everything.. This time…Timelapse. The video is great and I particularly like the fact that the first half of the video there is very little going on until you see us read some directions…

I’ve been workin’ on the railroad…

I have at least been working on a train. In 2008 my soapbox team “Team Save Ferris” installed our first soapbox car in the Forney Museum of Transportation. Since then we put in our second car the Mach 5. Well, the Forney is a pretty cool place so some of us have done a little bit of volunteer work. I have to say that I haven’t done a whole lot there, but I got the bug the other day and headed down to the Forney to see what I could help them out with.

When I walked into the museum I talked to the Volunteer director and he went through a list of projects and asked me what I’d like to work on. Well, I figured I would work on whatever was most important to him so I left it up to him. Turns out I ended up working on a 104 year old train car. This train car is pretty beat up. The whole thing is wood (with the exception of the chassis and wheels) and all the wood is definitely in rough shape. If I had all the time and money in the world I’d say that pulling all the wood off, planing it and re installing only the good stuff would be the best plan, but for now they are replacing just the really bad parts. So I was provided with wood, a handheld jigsaw, some sandpaper, a hammer and a cordless drill. The initial project was to replace the outer boards around an oval shaped window.

I was able to replace the boards and get the shape pretty close on the window without butchering it to bad with the limited tools that were available. but I am going to go back and finish it up with a bit more sanding and some primer and paint.

I will take some better photographs when I get a little farther on the project. For now the iPhone pix will have to do!

Red Bull Soap Box 2009

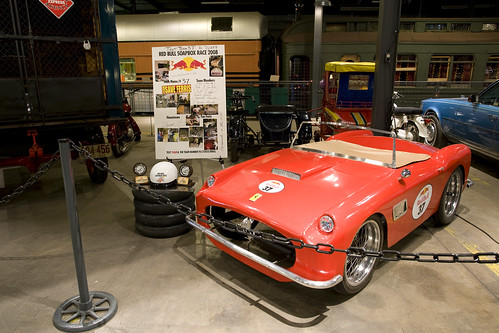
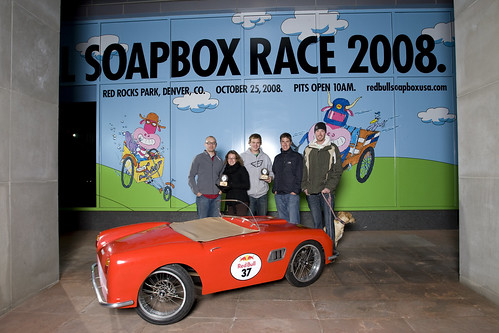
Well last year we put on quite a show for our competitors and fans at the same time. People could not believe the vehicle that we created when we went to Red Rocks last year to compete in the Red Bull Soapbox Race. Hell, we couldn’t believe it either. I mean, we built what I would consider, an exceptional replica of the Ferrari that we intended to build. No, it wasn’t to scale and no, it wasn’t completely accurate, but the final product is pretty damn nice looking.

Red Bull Soapbox - Los Angeles, CA

3D5R9593

This year we knew we had to do it again. We saw that the options were to go to Georgia or to LA and immediately jumped at the opportunity to compete against Hollywood. In our minds LA was going to be us competing against Custom car builders, custom motorcycle builders, Art Center, Hollywood production companies and the Hollywood elite. Imagine the budgets!? Imagine the creativity and the craftsmanship! Man we have to step up our game!
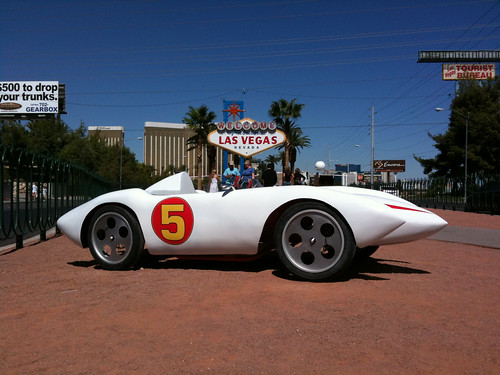
We met with some ideas. What car is going to get us to the podium? Which car is going to top the Ferrari… To be honest We decided that no car could top the Ferrari. I mean, the car, the movie, the scene and running the car backwards…it really was pretty amazing. So what car could we do that would come close? We had some ideas! The question was, could we build a car that we didn’t think looked as cool, but had better story lines, or do we build the ultimate of awesome cars? The decision wasn’t too hard for us to be honest. We like cool cars, so we chose the Mach 5 from speed racer. This car also gave us another possibility: the opportunity to do a female mold for our fiberglass layup!

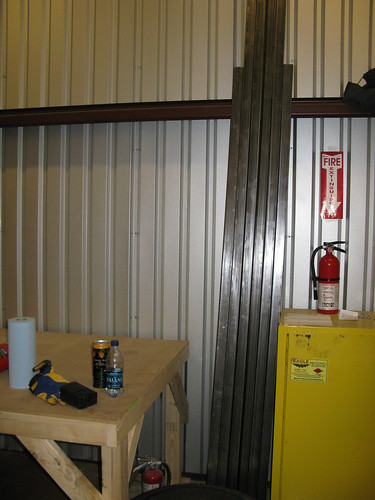
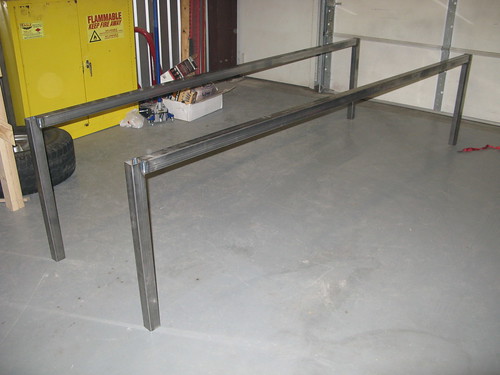
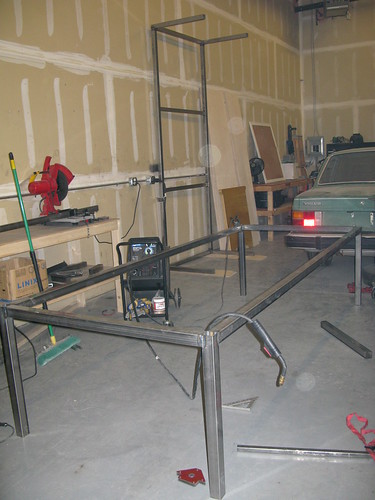
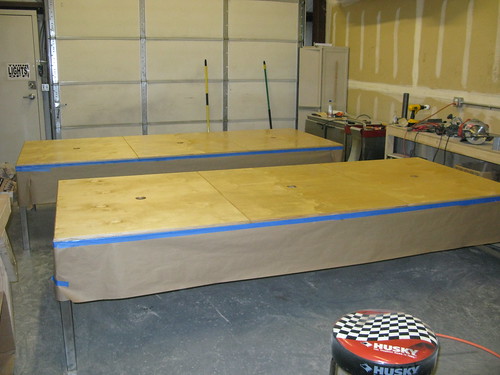
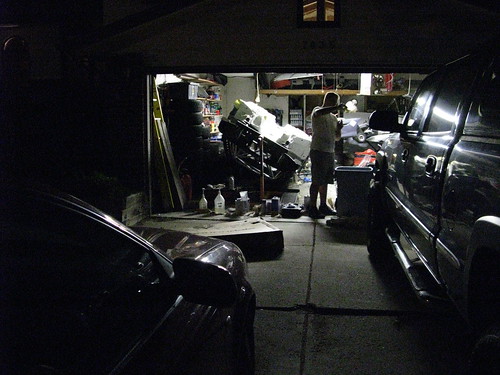
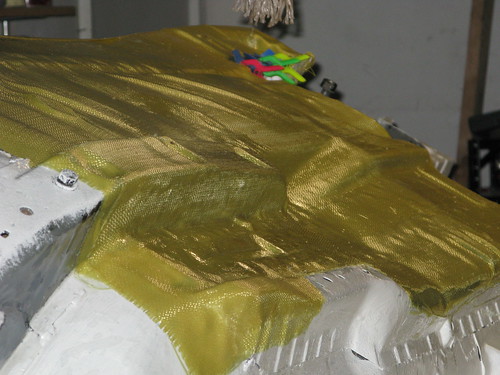
We applied to the race and we were accepted approximately 2 months before the race. It all began so quickly and we got involved very intensely. We build a chassis with bent steal and nicely machined steering, the chassis went together smoothly, but we soon realized that we had selected tubing that was simply too heavy. So back to the tubing bender we went to build it all again. We then shaped a plug for our mold. We started by cutting everything out on the waterjet and moving on to hand shaping, bondo and sanding until it was all perfect(ish). Onward and upward we laid up a fiberglass female mold which we pulled, did a lot of finishing to, bolted back together and laid up fiberglass for our final body. This all sounds simple when you put it into a paragraph, but we are talking hundreds of hours of work. I am guessing that each of us had over 300 hours of work in this car! In addition to all the work, we constantly came upon things that were going wrong. People who build cars know that some cars will fight you the whole time. The Mach 5 was one of those cars. Every time we thought we had it, something else cropped up that would cause more hours, more time and more frustration. We finally got the car in paint and put it into our trailer approximately 14 hours later to drive off to LA. The vehicle was still tacky when we put it in the trailer and the finger prints we put in it flowed out as we arrived in Las Vegas.

We got to Vegas and decided that applying the decals should be done in a nice prominent location. Where could we do it? How about right in front of the “Welcome to Fabulous Las Vegas” sign? So that is where we put them on. People watched and people asked questions. We love to show off our work and this was a great opportunity. We left Vegas with LA in our sites.

We arrived at the event at 4:45am on Friday Morning. News agencies were expecting several teams for the morning news and we were one of the teams that would be interviewed. Our vehicle was sitting in the dark as the other teams arrived. Crews were inflating Red Bull Arches on a big stage and putting the final touch on things that would be seen on the news. We were excited to meet some of our competition. This is a friendly race and we had been keeping an eye on a lot of the teams. Most teams post photos or videos of their vehicles progress and some were pretty intriguing. One of the first teams we met included fabricators from Overhaulin’. Their vehicle was pretty awesome and that was the moment we knew we were going to have to work hard for this one!

That evening at the Drivers meeting we met a lot of teams some from various production companies in Hollywood, one was from Pixar. UCLA and many of the colleges locally had teams as well as Custom motorcycle fabricators, Troy Lee Designs and plenty of other people who had a long list of credentials. I was psyched that nearly every team that I spoke to was gunning for us. They would tell us how they have been keeping an eye on our photos and videos. One team even said that they learned everything they know about working with fiberglass from watching the Ferrari Build! I can’t think of a bigger honor than to be the team to beat! We had some great conversations about the trials and tribulations of the vehicle builds. It is a funny place to be when something as trivial as a SoapBox race is the main focus of conversation. Everyone had been so involved in the build for so much of their waking lives for the past few weeks that it was about all anyone could think about! As the night came to a close we headed back and prepped for the event.

Early in the morning we headed up to the venue to prep our area. We put up display boards and got the car ready for the day. People began to gather and we took on our roles. We were pinned to our booth all day. The crowds were in love with the car and as the people’s choice voting it was clear we had a big following…however it wasn’t clear to everyone. At first the voting was switched! A vote for Team Speed Racer was showing up as a vote for Team Moustachios. We were nervous as we saw their name rise up on the board with over 25% of the crowds vote. Soon things were switched back and we started showing up on the board with or percentage growing. It was clear that the people loved the Mach 5!

The crowds subsided as we headed up to the stage. One thing led to the next and we were ready to perform our skit. We arrived on stage looking for our interviewer but Paul Rodrigues wasn’t anywhere to be found. We had seen that teams were either getting an interview or their intro video was being shown. So we heard announcers talking about our team and looked up to see our video only to realize that our skit music was playing! We scrambled to catch up, we tried to recover but in the end we simply had to push the car and walk away with our skit in shambles.

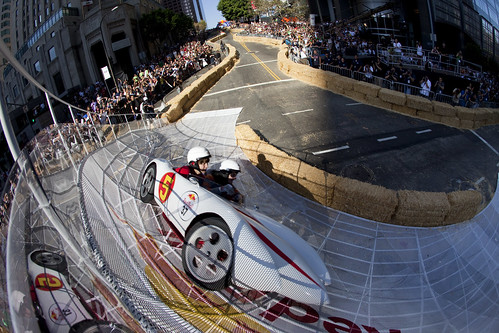
The car made its way down the course accelerating from 0 to 40+ miles/hr in under 1 city block. It launched over the first jump it came to with a crazy landing. It tore around the 8ft tall berm in complete control and Matt piloted it over the second jump with a better landing than the first. As they crossed the finish line he pulled the rear brake and skidded to a fantastic 180degree stop. Our time was the fastest time of the day. We had done it…at least we had done that part. Our skit was still looming in our heads as this hurtle to overcome…

The crowds greeted us on our way down the hill. It was clear that we made an impact and that people were going to remember our vehicle. Awards began and we were selected as the clear winner for the People’s choice award. It was a great feeling. We were one of only a few teams that were not from California. So to come in from out of town and have the popular vote, well that is pretty awesome. We were then selected for 3rd place. I was pleased with third. I mean with how much we had botched our skit it was pretty nice to be on stage again.

In the end we made some great new friends and had an amazing time. Our vehicle has been put into the Forney Museum of Transportation and has been a hit with the young and old alike! I can’t believe the amount of attention the vehicles have generated, but I am glad, because we put our heart and soul into its creation so it is nice to sit back and see it turn heads!
For photos of the Mach 5 check out our website GoTeamSpeedRacer
For photos of the Ferrari check out: Team Save Ferris